Upgrade and Monitor Packages on Ubuntu

It is a New Year. As I was moving my rigs around, I felt brave enough to potentially cause chaos and upgrade the packages. Mainly doing so to keep up to date on security issues.

SSHing in showed me the state of affairs:

211 packages can be updated.
4 updates are security updates.

To update the packages, type the following into terminal:

sudo apt-get update
sudo apt-get dist-upgrade

Lots of logging information should start scrolling by. If for some reason you need to track it via an actual log file, you can do the following:

tail -f /var/log/dpkg.log

Then, reboot for good measure:

sudo shutdown -r now

Next time you login, you will see all updates have been applied.

0 packages can be updated.
0 updates are security updates.

Finding Rigs on Your Local Network

Just moved my rigs to a network setup for DHCP, and as a result I lost control of what-rigs-have-what-IP.

The way I got a handle on it was to use nmap from one of my Ubuntu machines.

I’ve got a mix of Ubuntu and Windows machines.

To locate, I do a scan for all machines running SSH (port 22) or RDP (port 3389) on my local network (192.168.3.XXX). Then I go through and look for hosts that report “open” for the ports of interest.

sudo nmap -sS -p 22 192.168.3.0/24
sudo nmap -sS -p 3389 192.168.3.0/24

Troubleshooting When GPUs Don’t Show Up

I’ve built a few rigs, and seem to run into problems when added fourth, fifith, and sixth GPUs.

Generally speaking there are a few things to try.

  • When building a rig, don’t add all the GPUs at once.  Add them one at a time and make sure they show up incrementally.  It makes troubleshooting much easier.
  • Go into the BIOS and find the PCI area.  See if there is an option talking about multiple GPUs or cryptocurrency mining.
  • Go into the BIOS and see if your motherboard has a section that shows you per PCI slot if a card is detected.
  • Go into the BIOS under PCI area and set PCI speed to “Generation 1.”
  • Others online speak to having to clear the CMOS (BIOS) memory after each GPU add.  This usually involves shorting two jumpers on the motherboard – you will have to read your manual.  You may also have to readjust your boot order.  I tried this once, and Ubuntu complained until I reordered the boot disks.  I consider this effort a last resort.
  • Double check all of your connections and that you are supplying power to the card.  If you are using PCI risers try swapping cables or trying different PCI slots methodically.  This will let you determine if an individual piece is bad, or if you are running into a motherboard limit.
  • See if you can get a clue from the syslog file.  Look to see if the log is being perpetually written to, or something video related you can do more research on.
    $ tail -f var/log/syslog
  • Sometimes getting the manufacturer of the card helps.
    lspci -knn | grep VGA -A1
  • Running lspci gives you a lot of raw information of what is connected to your system. Can be useful in some situations.

Six GPUs on MSI Z170A Gaming Motherboard


Got a deal on a few 1060 3GBs via the GPU price watching site gpugarden.  At the moment those cards seem to be well-priced for mining Vertcoin.

Had a lot of trouble getting the fifth and six GPU online working on my MSI Z170A initially, but I figured it out and now I am happily mining away.  It was maddening as the card would show up in MSI’s nifty interface, as well as in various commands run in Ubuntu, but would not show up when mining or in NVIDIA’s XServer.

Did some general troubleshooting, which I write about here.

But, the ultimate solution was flashing and configuring the motherboard…HOWEVER drama ensued with Ubuntu (jump to the last step for a potential head’s up).

  1. First, things could be easy for you.  If you have a later version of motherboard all you may have to do is flip a flag in the BIOS for “cryptocurrency”.  Reboot your computer and hold the delete key to get into the BIOS.  Then navigate to: Settings -> Advanced -> PCI Subsystem Settings -> “Above 4G Memory/Crypto Currency mining” -> Enabled.
  2. If you do not see that option, then you may need to flash the BIOS (my case).  Download the updated version from here.  NOTE: The link provided was relative to me, there are M7 type boards.
  3. Put the file onto some sort of USB device.  Most people will use a stick, but I didn’t have any.  I ended up using an SD Card with a USB reader (I know…clever).
  4. Watch this strangely silent video from MSI.
  5. Reboot, and hopefully Ubuntu will load and your card will show up.  BUT, once rebooted, and no matter how I changed the boot order for devices Ubuntu could not locate the boot disk.  I then went through procedures to repair the stick using Live CD, but that failed.  Somehow along the way my USB stick that I had the Ubuntu OS on died.  I ended up having to reinstall Ubuntu.  Not a big deal for me, as I took the opportunity to get a clean install on a new SSD I purchased.  However, for you it could be an existential crisis.

My Ubuntu Bag of Tricks

    These are commands that I commonly find myself using when trying to manage mining rigs. Perhaps you will find them useful as well!
    • Different ways to transfer files and directories between hosts using scp. scp stands for secure copy. It copies the files over the ssh protocol.

      Send a file from your local host to a remote host:

      scp file.txt username@remotehost:/some/remote/directory

      Send a file from a remote host to your local host:

      $ scp username@remotehost:file.txt /some/local/directory

      Copy files between two remote hosts:

      $ scp username@remotehostx:/some/remote/directory/file.txt username@remotehosty:/some/remote/directory/

      Copy a local directory to a remote host:

      $ scp -r local_folder username@remotehost:/some/remote/directory/destination/
    • Get the sha256 hash of a file on a mac. Sometimes when you download software they will show a big long list of characters. This is a unique signature for the file, and after you download the file you can see if you can check to see if you get the same signature locally. This comes in handy when you download critical software (in my case a crypto coin wallet for Vertcoin).
      $ openssl sha -sha256 filename_of_interest
    • Log a website’s performance over time using a Mac’s terminal and some fancy commands.
      $ while sleep 360; do curl -s -w '\nLookup time:\t%{time_namelookup}\nConnect time:\t%{time_connect}\nPreXfer time:\t%{time_pretransfer}\nStartXfer time:\t%{time_starttransfer}\n\nTotal time:\t%{time_total}\n' -o /dev/null http://208.97.140.30:7903/static/ > latency_output && date > latency_output; done
      

      Fields in bold you need to change to your own, with the first being how many seconds between attempts, the second being what URL you are interested in, and then the third is the name of the file you want the output to be stored in.

      To follow along on the progress, open up another terminal window and run the following against the output file.

      $ tail -f latency_output
      

      Again, change the bolded filename to what you named it in the command before this one.

      References: 1 2

    • To change your hostname (requires a reboot), edit the following two files
$ sudo nano /etc/hostname
$ sudo nano /etc/hosts
  • For a given process id determine what the full path is
    $ sudo ls -l /proc/WHATEVER_THE_PROCESS_IS_ID_IS/exe
  • Pull down only the latest code from a git repository
    $ git clone --depth=1 git@github.com:organization/your-repo.git
  • Other commands I will write about later
    $ spd-say "hello"

Vertcoin Mining with ccminer – Easy Version

I’ve been impressed with the Vertcoin community. It feels like there is a sense of direction, and that everyone is doing there best to have the coin succeed.

To help others get started I documented the steps I went through with my NVIDIA 1060’s on Ubuntu.

Note: This tutorial only works for NVIDIA cards.

The basis for these steps were from this video. You can follow along in the video, and then refer back here for the commands to cut and past.

Generally speaking, we are going to install some prerequisite software (NVIDIA’s CUDA), create directory for ccminer, pull down the code from github (a repository for open source developers), compile, connect to a pool, and start mining!

  1. For the mining software, ccminer, to do its thing you need to install software from NVIDIA.To get the download link go here, and then choose your platform.  Below are the selections I made for my system.
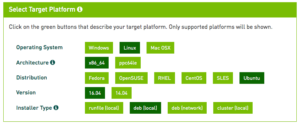
A download link will be generated.  Now you can download it locally, or you can copy the link and do a wget  as follows. Make sure you cd to the directory you want the ~2GB file in. Note: The URLs and filenames referenced below are what is available a the time of posting. As time goes on you likely will need to use different addresses and as a result filenames.
    $ wget https://developer.nvidia.com/compute/cuda/8.0/Prod2/local_installers/cuda-repo-ubuntu1604-8-0-local-ga2_8.0.61-1_amd64-deb

    Now lets install CUDA:

    $ sudo dpkg -i cuda-repo-ubuntu1604-8-0-local-ga2_8.0.61-1_amd64.deb
    $ sudo apt-get update
    $ sudo apt-get install cuda
    

    You can then delete the file you downloaded.

  2. Just in case you haven’t installed git yet, let’s try and install it. If it is already installed nothing bad will happen, and you practiced typing.
    $ sudo apt-get install git
  3. For convenience, I like to place these directories on my desktop. Here’s how to do that, and then change directory into it.
    $ mkdir ~/Desktop/vertcoin-ccminer/
    $ cd ~/Desktop/vertcoin-ccminer
  4. Now pull down the source code into this directory and change directory again into a subdirectory that git created.
    $ git clone https://github.com/tpruvot/ccminer.git
    $ cd ccminer
    
  5. Pull down some more supporting libraries before we compile this bad boy. You could have done this from another directory or at an earlier step. But makes sense here conceptually as we need it for the next following step.
    $ sudo apt-get install libcurl4-openssl-dev libssl-dev libjansson-dev automake autotools-dev build-essential
    
  6. This is where we start getting into voodoo. You need to make sure you cut an paste the following commands properly – particularly the configure one. Typos will cause things to fail. Between each of the following commands you will see lots of configuration code go. I comment each of the lines with a # – that means ubuntu will ignore what follows it (i.e. it won’t execute it). If you want to high-level view of the gory details on compilation you can click here.
    $ ./autogen.sh # this builds a configure script tuned for your system
    $ ./configure CFLAGS="-O3 -Wall -march=native" # this sets compilation flags in the script autogen made
    $ ./build.sh # lots of compilation commands should fly by, and when done you should be returned to a prompt with no errors
    
  7. Awesome! Now we just start mining!You can try the following briefly and see that it works. Hopefully you will see progress.
    $ ./ccminer -a lyra2v2 -o stratum+tcp://208.113.166.44:9171 -u VrdExKvWGUct8o1icbsrPSt92BUGWSxhax -p passwordnotneeded

    Once it starts going, you need to hit CTRL+C and/or CTRL+X to cancel.

    Your next step is to change the bolded fields to be a mining pool you like (though I’m partial to the one listed) and create a wallet for yourself.

Magical OSX Script to Backup Remote Directories Locally

You can use the following script to backup directory structures from a remote host.  

It will create a time stamped folder structure that will allow you to track multiple backups over time.

I use this to backup my Dreamhost website before I do any big updates.  Likely could also be used in crypto scenarios. This may work on Ubuntu as well – have not tried it.

It uses rsync which is an awesome directory synchronization tool. It can be used to synchronize directories and only transfer what files have changed (i.e. the deltas).

Here it is:

#!/bin/sh

read -p "Continue with PROD -> LOCAL BACKUP (yes/no)? " CONT

if [ "$CONT" == "yes" ]; then
        backup_parent_dir="$HOME/Desktop/backup prod"
        backup_date=`date +%Y_%m_%d_%H_%M`
        backup_dir=${backup_parent_dir}/${backup_date}

        mkdir -p "$backup_dir" # The -p flag will create all subdirectories needed to creat the target directory

        rsync -avz -C --delete some_username@somewebsite.com:/some/awesome/folder/path/ "$backup_dir"
else
        echo "OK...not doing anything";
fi

Bold indicates areas you will need to customize per your lifestyle.

Note on the bolded some_username@somewebsite.com part…that only works without username and password because I set up the two machines to trust each other as explained here.

FIXED: PCIe Bus Error on BIOSTAR TB250-BTC

My rig with a BIOSTAR TB250-BTC board was constantly logging PCIe Bus Error messages under /var/log/kern.log and /var/log/sys.log. About twenty GBs worth or log files!

Beyond the logging errors, I couldn’t have more than four GPUs attached until I performed the below fix. FYI, I am using five ZOTAC GeForce GTX 1060 AMP Edition (model: ZT-P10600B-10M) cards.

The solution: you need to enable “Miner Mode” in the BIOS Settings for the board.

  1. During boot hold the delete key until you enter the motherboard setup.
  2. Once in, navigate to: Chipset => Miner Mode => Set to [Enabled]

For reference, here’s the error that was filling my logs:

pcieport 0000:00:1c.7:   device [8086:a297] error status/mask=00000001/00002000
pcieport 0000:00:1c.7:    [ 0] Receiver Error         (First)
pcieport 0000:00:1c.7: AER: Corrected error received: id=00e7
pcieport 0000:00:1c.7: PCIe Bus Error: severity=Corrected, type=Physical Layer, id=00e7(Receiver ID)

Doing research online led me down a couple of paths that are NOT needed, and revolved around adding pci flags to /etc/default/grub. Some red-herring suggestions were:

  • GRUB_CMDLINE_LINUX_DEFAULT=”quiet splash pci=nommconf”
  • GRUB_CMDLINE_LINUX_DEFAULT=”quiet splash pci=nomsi”

Lesson for the future: After building rigs it would be worth seeing if errors are being perpetually written to the /var/log/ directory. You may not realize it until you either run out of space or if the error finally manifests itself in a way that will cause you to investigate. In my case it was added a fifth GPU.

Running Headless Nvidia Mining Rig Without HDMI Plugs

To run a headless Ubuntu server that you can remote into and will mine your crypto you need to do one of the following:

  • The easy: Buy a dummy HDMI plug for each rig and move on with your life.
  • The hard (but adventuresome):
      1. From the terminal run this command to update /etc/X11/xorg.conf to fake your system out into thinking you have a monitor connected:
        $ sudo nvidia-xconfig --use-display-device="DFP-0" --connected-monitor="DFP-0"

        Note: this command assumes that you previously booted the system into the GUI and installed the “NVIDIA X Server Settings” client (needed to populate xorg.conf). See my overclocking post if you don’t have “NVIDIA X Server Settings” running yet.

      2. Now if you want to VNC into (a.k.a. “remote into”) your rig, you need to install a VNC server on the destination machine (see my post on steps for that).Assuming you did step one above, and installed a VNC server you will discover that when you remote in the resolution defaults to 800 x 600 and is not helpful. In order to have a sensible resolution default when you remote in, modify (or create) a file sudo nano /etc/lightdm/lightdm.conf to resemble the following:
        [Seat:*]
        autologin-guest=false
        autologin-user=YOURLOGIN
        autologin-user-timeout=0
        display-setup-script=/home/YOURLOGIN/Desktop/vnc_monitor_resolution.sh
        session-setup-script=/home/YOURLOGIN/Desktop/vnc_monitor_resolution.sh

        Note: Update YOURLOGIN with the account you use to SSH into with.

        Now, we have to create and configure the vc_monitor_resolution.sh file.

        $ cd ~/Desktop
        $ nano vnc_monitor_resolution.sh

        Then within the file, add:

        xrandr --fb 1360x768

        Note: The resolution can be whatever works for you.

        After that we have to make the file executable.

        chmod a+x vnc_monitor_resolution.sh

        Next time you VNC in, magic should happen and it will be in the resolution specified above!

        (References: 1 2 3)